


First Aid Until the Ambulance Arrives (CPR Using AED)
This section introduces the steps for cardiopulmonary resuscitation using an AED.
For those who want to know more, we recommend taking a lifesaving course offered by the fire department and others.
Cardiopulmonary Resuscitation Procedures
Follow steps 1 to 12 to perform cardiopulmonary resuscitation and wait for the arrival of the ambulance.
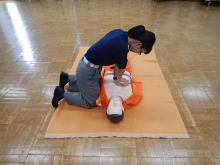
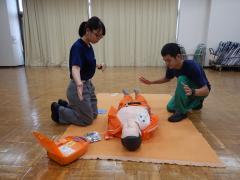
Step 1: Check Surrounding Safety
First, check if the surrounding situation is safe, and then approach the injured person.
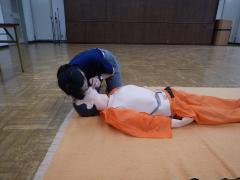
Step 2: Check Reaction (Consciousness)
Gently tapping the shoulder while calling out "Are you okay?" near the injured person's ear, and checking for a response.

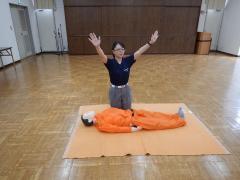
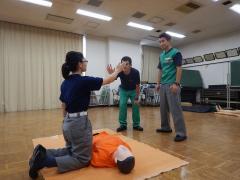
Step 3: Call for Help
If there is no response, call for help with a loud voice and gestures, and request "Please call 119" "Please bring the AED".
If there are no collaborators, first call 119 yourself, and if there is an AED nearby, go get it.
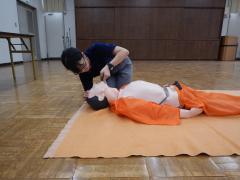
Step 4: Check Breathing
While observing the movement of the chest and abdomen of the injured person, check for the presence of normal breathing within 10 seconds.
If there is no movement in the chest and abdomen, or if you are unsure, immediately begin chest compressions.
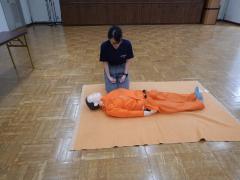
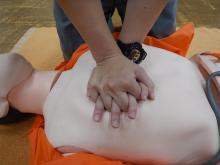
Step 5: Chest Compressions
If normal breathing is not observed, immediately perform chest compressions.
The hand position for chest compressions is to place both hands stacked in the center of the chest and press down firmly until the chest sinks about 5 cm vertically from above, at a rate of 100 to 120 compressions per minute.
Step 6: Airway Management
Place one hand on your forehead, and use the index and middle fingers of the other hand to touch your chin. Tilt your head back, raise your chin, and adopt a posture that makes it easier for air to flow into your lungs.
Step 7: Artificial Respiration
While maintaining airway clearance, pinch the patient's nose with the thumb and index finger of the hand placed on the forehead. Open the patient's mouth wide and cover it, ensuring no air leaks, and blow into the patient's mouth twice (taking 1 second for each time) until the chest rises slightly.
Step 8 Continuing Cardiopulmonary Resuscitation (30 to 2)
After performing 30 consecutive chest compressions, give 2 rescue breaths. Continue without interruption until you hand over to the emergency team.
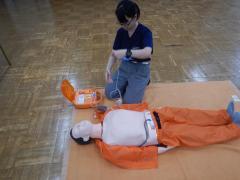
Step 9: Use of AED
Once the AED arrives, take it out of the case, place it near the injured person, and press the power button. (Some models turn on automatically when the lid is opened.) After that, follow the voice instructions to operate it.
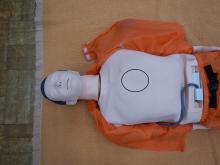
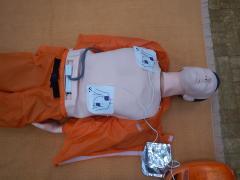
Step 10: Apply the electrode pads
Remove the clothing of the injured person and expose the chest. At that time, if there are any patches or medications on the chest, remove them, and if the chest is wet with sweat, wipe it with the provided towel.
Open the bag of the electrode pads, peel off the sheet, and firmly attach the adhesive side to your chest. (The position for attachment is indicated with illustrations on the main unit and the electrode pads.)
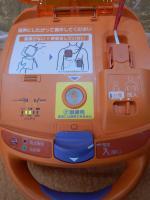
Step 11: Perform Analysis and Electric Shock
When the electrode pads are applied, the AED checks the electrocardiogram. A voice message will say, "Please do not touch the body," so alert those around to step back and ensure that no one is touching the patient. If the AED determines that a shock is necessary, charging will begin.
After the charging is complete, before administering the electric shock, confirm once again that no one is touching the victim, and then press the shock button (the flashing button).
Step 12: Repetition of Cardiopulmonary Resuscitation and AED
After performing the electric shock, immediately resume cardiopulmonary resuscitation. About 2 minutes later, the AED will automatically analyze the electrocardiogram again, so please follow the voice message. From then on, continue to perform cardiopulmonary resuscitation and repeat the electrocardiogram analysis with the AED while waiting for the arrival of the ambulance.
This page is managed by the Inagi City Fire Department Fire Suppression Division
〒206-0802 2111 Higashi-Naganuma, Inagi City, Tokyo (Inagi Fire Station)
Phone number: 042-377-7119 Fax number: 042-377-0119
Contact the Fire Suppression Division of Inagi City Fire Department